
Well-defined abs and core muscles not only enhance physical appearance but also contribute to overall strength and stability. Incorporating targeted abdominal exercises into your fitness routine can help you achieve a stronger midsection and improve posture.
In this article, we discuss some effective home exercises tailored to target your abs and core muscles.
Why focus on abs and core muscle training?
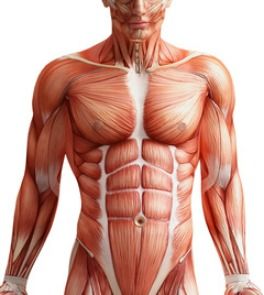
The abs and core muscles, also called abdominal muscles, are a group of muscles in the front of the abdomen, or belly. They run from your ribs down to your pelvis. There are four main abdominal muscles:
- Rectus abdominis
- External obliques
- Internal obliques
- Transverse abdominis
Benefits of Strong Abs and Core Muscles:
- Improved posture and core stability
- Reduced back pain
- Enhanced athletic performance
- Tighter midsection
9 best exercises for abs and core muscles
Here are exercises for abs and core muscle training at home :
Warm-up:
A good abs and core muscle warm-up should prep your core muscles for exercise and help prevent injury. Here are some exercises to get you going (aim for 30 seconds each):
- Light Cardio: Get your blood flowing with jumping jacks, jogging in place, or high knees.
- Marches: High knees, butt kicks, or marching in place will engage your core and get it warm.
- Arm Circles: Forward and backward arm circles loosen up your upper body and indirectly engage your core.
- Russian Twists: This classic core exercise warms up your obliques while improving rotation. Sit on the floor with knees bent and feet flat, lean back slightly, and twist your torso from side to side with arms extended.
Planks:
Here’s how to perform a basic plank to target your abs:
Starting Position:
- Get on the floor on your forearms. Stack your elbows directly under your shoulders, with your forearms flat on the ground.
- Extend your legs back, resting on your toes. Keep your feet hip-width apart.
- Create a straight line from your head to your heels. Engage your core by pulling your belly button in towards your spine.
- Relax your head and neck, and gaze slightly in front of you at the floor.
Form:
- Maintain a flat back. Don’t let your hips sag or arch your back.
- Keep your core engaged throughout the hold. Imagine someone is about to punch you in the stomach and you’re bracing for it.
- Breathe normally. Don’t hold your breath.
Progression:
- If you’re a beginner, start by holding a plank for 10-15 seconds. Gradually increase the hold time as you get stronger. Aim for 3 sets of 30-60 second holds.
- Once you can comfortably hold a plank for 60 seconds, you can try plank variations like side planks or high planks (performed on your hands instead of forearms).
Additional Tips:
Here are some additional tips:
- Warm up before doing planks with some light cardio and dynamic stretches.
- Don’t hold your breath while planking. Breathe steadily throughout the exercise.
- If you feel any pain in your lower back, stop the exercise and consult a doctor.
Side Plank:
The side plank is a great exercise for strengthening your abs and core muscles, especially your obliques, which are the muscles on the sides of your torso. Here’s how to perform a basic side plank:
Starting position:
- Lie on your right side with your legs extended and stacked on top of each other.
- Prop yourself up on your right forearm, elbow directly under your shoulder.
- Engage your core by drawing your navel in towards your spine.
- You can rest your left hand on your hip or extend it straight up towards the ceiling.
Lifting your hips:
- Breathe out and press down into your forearm as you lift your hips off the mat.
- Imagine someone is pulling your hips up towards the ceiling.
- Your body should form a straight line from your ankles to your shoulders.
- Hold this position for a count as long as you can comfortably maintain good form.
Additional Tips:
- Keep your neck neutral and avoid arching your back.
- If you’re a beginner, you can start with your knees bent, stacked on top of each other, for a modified version.
- Focus on squeezing your core muscles the entire time you hold the position.
- Breathe normally throughout the exercise.
Progression:
Once you can hold a side plank for 30 seconds on each side, you can try these progressions:
- Raise your top leg off the mat for a greater challenge.
- Place your forearm on a stability ball for an added element of instability.
- Lift your hips up and down in a controlled motion for a more dynamic variation.
- Lie on your side with your elbow directly under your shoulder.
- Stack your feet on top of each other, or stagger them for more stability.
- Lift your hips off the ground, forming a straight line from your shoulders to your ankles.
- Hold for 30 seconds to 1 minute per side.
Variations:
You can also make planks more challenging by adding arm or leg movements. Here are a few examples:
- Plank with shoulder taps: Briefly lift one hand off the ground and tap your opposite shoulder. Repeat with the other arm.
- Plank leg lifts: Lift one leg off the ground for a few seconds, then lower it back down. Repeat with the other leg.
- Spider-man plank: Bring one knee towards your elbow, then return it to the starting position. Repeat with the other leg.
Bicycle Crunches:
Bicycle crunches are a great way to target your abs and core muscles, specifically your obliques, which are the muscles on the sides of your torso. Here’s how to perform them with proper form:
Preparation:
- Lie flat on your back on a yoga mat or exercise mat.
- Bend your knees and bring your feet flat on the floor, hip-width apart.
- Engage your core by pressing your lower back into the mat.
- Place your hands behind your head with your elbows flared out to the sides. Don’t interlace your fingers behind your head to avoid straining your neck.
Steps:
- Lift your head and shoulders slightly off the ground, engaging your abs.
- Extend one leg straight out in front of you, while keeping the other knee bent with your foot flat on the floor.
- Now comes the pedaling motion:
- Rotate your torso towards the bent knee, bringing the opposite elbow towards that knee as if trying to touch it (but don’t force it).
- Keep your extended leg slightly elevated throughout the movement.
- Exhale as you twist and bring the elbow towards the knee.
- Inhale as you reverse the motion, lowering your elbow and extended leg while simultaneously raising the other knee towards your chest and bringing your opposite elbow towards that knee.
- This is one complete rep. Continue alternating sides for your desired reps and sets.
Additional Tips:
- Focus on initiating the movement with your core, not by pulling on your neck with your hands.
- Maintain a smooth and controlled motion throughout the exercise.
- Avoid arching your lower back by keeping your core engaged and your lower back pressed into the mat.
- If you feel any pain in your lower back, stop the exercise and consult a healthcare professional.
Russian Twists:
The Russian twist is a great exercise to target your abs and core muscles, especially your obliques. Here’s how to do it with proper form:
How to perform?
- Sit on the floor with your knees bent and feet flat on the ground.
- Lean back so your torso is at a 45-degree angle to the floor. Engage your core and keep your back straight throughout the exercise.
- Link your hands together in front of your chest, or extend your arms straight out in front of you with your palms facing down.
- Rotate your torso from side to side, twisting as far as you comfortably can without arching your back. Imagine you’re squeezing your obliques with each twist.
- Inhale as you return to the center, and exhale as you twist to the other side. That’s one rep.
Here are some additional tips:
- Keep your feet flat on the ground for beginners, or lift them off the ground a few inches for a greater challenge.
- Focus on using your abs to initiate the movement, not swinging your arms.
- Maintain a steady and controlled twist. Don’t jerk your body.
- If you feel any pain in your lower back, stop the exercise and consult a doctor.
Progression:
- Once you’ve mastered the basic Russian twist, you can make it more challenging by holding a weight, such as a medicine ball or dumbbell, in your hands.
- You can also try the exercise on a decline bench or exercise ball.
Mountain Climbers:
Mountain climbers are a great exercise that targets your abs and core muscles, but they also work multiple muscle groups. Here’s how to do them with proper form:
Starting position:
- Begin in a high plank position. Your hands should be shoulder-width apart, directly under your shoulders.
- Engage your core by pulling your belly button towards your spine.
- Keep your back straight and your neck in line with your spine. Your body should form a straight line from head to heels.
The movement:
- From the plank position, alternate rapidly bringing each knee towards your chest.
- Aim for a quick, light tapping motion rather than a full knee tuck.
- Maintain a strong core and keep your hips level throughout the exercise. Avoid sagging or arching your back.
- Focus on driving your knees towards your chest with your abs, not swinging your legs with momentum.
Additional Tips:
- Maintain a steady breathing pattern throughout the exercise.
- Start with slow and controlled repetitions to ensure proper form.
- You can increase the speed as you get more comfortable with the movement.
- If you find the exercise too challenging on your knees, you can perform a modified version by keeping one foot on the ground while bringing the other knee toward your chest.
Variations:
- Low-impact mountain climbers: This variation is easier on your knees. Bring one knee towards your chest while keeping your foot elevated off the ground. Then, return it to the plank position and repeat with the other leg.
- Mountain climbers with a medicine ball: Hold a medicine ball between your hands while performing the exercise. This will add an extra challenge to your core
Leg Raises:
Here’s how to perform a basic leg raise to target your abs and core muscles:
Preparation:
- Lie flat on your back on a yoga mat or exercise mat.
- Extend your legs straight up towards the ceiling, with your feet together and toes pointed.
- Place your arms alongside your body with palms facing down, pressing them lightly into the floor for stability.
Movement:
- Engage your core by pulling your belly button in as if pushing your lower back towards the ground. This activates your transverse abdominis.
- Exhale slowly as you lift your legs together. Ideally, aim to raise them until your shins are perpendicular to the floor (90 degrees) but stop if your lower back starts to arch off the mat.
- Inhale as you slowly lower your legs back down in a controlled motion. Don’t let your feet completely touch the floor; keep them hovering slightly above the ground throughout the exercise.
Additional Tips:
- Maintain proper form throughout the exercise. Focus on initiating the movement from your hips and core, not by swinging your legs with momentum.
- Keep your legs as straight as possible. If you find it difficult, you can bend your knees slightly at the start.
- Breathe properly. Exhale as you lift your legs and inhale as you lower them.
- Start with a lower number of repetitions (e.g., 10-15) and gradually increase sets and reps as you get stronger.
Other Modification:
If you’re a beginner or lack core strength, here are some modifications:
- Raise your legs only to a 45-degree angle instead of a full 90 degrees.
- Start with fewer repetitions and sets.
- Lower your legs down to the floor with each rep, but make sure to keep your core engaged throughout the movement.
Progression:
Once you can comfortably perform the basic leg raises, you can make them more challenging by:
- Raising your legs one at a time.
- Hold your legs at the top position for a brief pause before lowering them.
- Lowering your legs down and then tapping your toes lightly on the floor before raising them again (flutter kicks).
Caution:
- Leg raises can strain your lower back if not performed correctly. Avoid arching your back off the floor during the exercise.
- If you feel any pain in your lower back, stop the exercise and consult a doctor.
Flutter kicks:
Flutter kicks are a great exercise to target your lower abs. Here’s how to perform them with proper form:
Preparation:
- Lie on your back with your legs extended straight up towards the ceiling. You can keep your arms down by your sides or place them underneath your lower back for light support.
- Engage your core by pressing your lower back into the ground.
- Lift your legs slightly off the ground, keeping them straight with just a small bend at the knees if needed. Aim for a 45-degree angle between your legs and the floor.
Flutter Kick:
- Start with a controlled flutter kicking motion. Imagine you’re lightly kicking water, alternating legs quickly in a small up-and-down motion.
- Focus on keeping your core engaged throughout the movement. Don’t swing your legs wildly or raise your lower back off the ground.
- Maintain a smooth and controlled flutter, keeping your legs mostly straight with a slight bend at the knees.
Additional Tips:
- Maintain a controlled pace you can manage while keeping your form strict.
- If you find your lower back arching, lower your legs slightly or take a break.
- You can increase difficulty by increasing the flutter speed or keeping your legs lower (closer to the ground).
Sit-ups:
Sit-ups are a great way to strengthen your abs and core muscles. Here’s a step-by-step guide on how to perform them with proper form:
Preparation:
- Lie flat on your back with your knees bent and feet flat on the floor. Keep your feet hip-width apart for stability.
- Engage your core by pressing your lower back into the ground.
- Cross your arms lightly over your chest, or place your hands behind your ears without pulling on your neck.
The movement:
- Initiate the movement by exhaling and curling your upper body off the ground. Think about bringing your ribs towards your hips.
- As you come up, keep your chin slightly tucked and avoid straining your neck. Aim for your torso to reach a 45-degree angle with the floor.
- Maintain a neutral spine throughout the movement. Don’t arch your back or pull on your neck to lift yourself up.
Returning to starting position:
- Inhale as you slowly lower yourself back down to the starting position.
- Focus on controlling the movement rather than just dropping back down.
Additional Tips:
Here are some additional tips for performing sit-ups:
- Keep your core engaged throughout the entire movement.
- Breathe properly. Exhale as you come up and inhale as you lower yourself down.
- Don’t force reps. If you can’t maintain proper form, stop and rest.
- You can modify the exercise by keeping your feet elevated on a bench or having a partner hold them down for you.
Things to keep in mind:
- Sit-ups can put strain on your lower back, especially if not done with proper form. If you experience any back pain, stop the exercise and consult a doctor or physical therapist.
- Other exercises target your core muscles and might be more suitable for you, such as crunches or planks.
Hollow hold:
The hollow hold is a great exercise to strengthen your abs and core muscles, and it’s pretty simple to do once you get the form down. Here’s a breakdown of how to perform it:
Preparation:
Find a comfortable exercise mat on the floor.
Steps:
- Lie down on your back with your legs extended and arms by your sides.
- Engage your core by pressing your lower back into the ground. Imagine you’re trying to press your spine down to create a flat surface.
- Squeeze your inner thighs together.
- Now, lift your legs just a few inches off the ground. Keep your heels pointed and toes flexed.
- Raise your shoulders and head slightly off the ground, reaching your arms overhead and behind you. Think about creating a slight banana shape with your body.
- Crucial point: Throughout the hold, maintain a flat lower back pressed into the ground. Don’t let your arch develop in your lower back.
Hold and Breathe:
Hold this position for as long as you can comfortably maintain good form, typically 30 seconds to start. Breathe normally throughout the hold.
Lowering:
Slowly lower your legs and shoulders back down to the starting position.
Modifications:
- If this is too challenging at first, you can modify the exercise by keeping your knees bent and your feet flat on the floor. Focus on engaging your core and pressing your lower back into the ground.
- Another option is to hold your arms out to your sides instead of overhead.
Additional Tips:
- Focus on quality over quantity. It’s better to hold the position for a shorter time with good form than to sacrifice form for a longer hold.
- As you get stronger, you can increase the hold time or try a more advanced variation, as the hollow body holds with leg or arm pulses.
Cool-down:
After your abs and core muscles work out, a cool-down helps your muscles relax and improves flexibility. Here are some static stretches to target your abs (hold each for 30 seconds):
- Supine Knee Pull: Lie on your back with your knees bent and feet flat. Pull one knee to your chest at a time, gently hug your knee, and feel the stretch in your lower abs.
- Child’s Pose: Rest on your knees while sitting back on your heels, drape your torso between your thighs, and reach your arms forward. This stretches your entire core and back.
- Seated Forward Fold: Sit on the floor with your legs extended, reach forward, and try to touch your toes (or as far as you comfortably can) while keeping your back straight. Feel the stretch in your lower back and abs.
Conclusion:
Incorporating these home exercises into your routine can help you build strong and defined abs and core muscles without the need for expensive equipment or gym memberships. Consistency is key, so aim to perform these exercises 2-3 times per week, gradually increasing the intensity and duration as you progress.
FAQs
From the above list, these are great abs and core muscle workouts you can do from home.
Building strong abs and core muscles is achievable at home without any equipment! Here are some tips to get you started:
- Focus on form over reps: It’s more important to perform exercises with proper technique to target the right muscles and avoid injury.
- Engage your core: Before each exercise, take a deep breath and brace your core as if you’re about to get punched in the stomach. This will help isolate and activate your core muscles.
- Incorporate variety: Many bodyweight exercises target different core muscles. Try to include a mix of exercises in your workout routine to challenge your entire core.
Here are some bodyweight exercises you can try for a strong core:
- Plank: This classic exercise strengthens your entire core, including your abs, obliques, and lower back. Start in a push-up position with your forearms on the ground. Keep your body in a straight line from head to toe, and hold for as long as you can with good form.
- Crunches: Lie on your back with knees bent and feet flat on the floor. Lift your upper back off the ground, focusing on contracting your abs rather than using momentum from your neck.
- Russian twists: Sit on the floor with your knees bent and feet flat. Lean back slightly and lift your feet off the ground. Twist your torso from side to side, bringing your hands to touch the ground on each side.
- Leg raises: Lie on your back with legs extended straight up. Slowly lower your legs down towards the ground, keeping your core engaged and stopping just before your lower back arches off the floor. Raise your legs back up to the starting position.
- Mountain climbers: Get into a high plank position. Bring one knee towards your chest, then quickly switch legs and bring the other knee in. Maintain a fast pace while keeping your core engaged.
Is a 10-minute abs and core muscles workout good?
A 10-minute core workout can be a very effective way to strengthen and tone your core muscles. Here’s why:
- Time-efficient: Even a short workout can provide benefits, especially if you are consistent.
- Core strength is essential: A strong core improves stability, and posture, and helps prevent injuries in other exercises.
- Targets multiple muscles: Core exercises work various muscle groups, including your abs, obliques, and lower back.
You can find many 10-minute core workout routines online or in fitness apps that require no equipment or household items. If you’re new to working out, begin with bodyweight exercises and gradually increase the intensity as you get stronger.
Here are some additional tips to get the most out of your 10-minute core workout:
- Focus on form: Quality over quantity. It’s important to perform the exercises with proper form to target the right muscles and avoid injury.
- Engage your core: Throughout the exercises, concentrate on tightening your core muscles, not just using momentum.
- Warm-up and cool down: Spend a few minutes on light cardio and dynamic stretches to prepare your body and avoid injury. Do some static stretches after your workout to improve flexibility.
Is it OK to do core every day?
Doing core exercises every day isn’t necessarily the best approach. Here’s why:
- Muscle recovery: Your core muscles, like any other muscle, need time to rebuild and repair themselves after a workout. Daily core workouts can hinder this process and potentially lead to injury.
- Overtraining: Constant strain on your core can lead to fatigue and make it harder to perform other exercises that engage your core.
That said, there are some nuances:
- Low-intensity core work: If you’re doing low-intensity exercises like planks or light holds, you might be able to manage daily core work. But listen to your body and take rest days if needed.
- Part of a larger workout: If your core workout is just a small part of a larger routine that focuses on different muscle groups each day, then daily core work might be okay.
Generally, it’s recommended to give your core at least one rest day between workouts. Aiming for 2-3 core workouts per week is a good starting point. You can adjust this frequency based on the intensity of your workouts and how your body feels.

I am a highly skilled and experienced content writer with a Doctorate in Therapy degree. With a deep understanding of the human body and a passion for health and wellness. I combines my clinical expertise and writing skills to create valuable and engaging content.
Pingback: 8 best Home exercises for hamstrings - Problem Therapist
child porn